> For the complete documentation index, see [llms.txt](https://docs.multiset.ai/llms.txt). Markdown versions of documentation pages are available by appending `.md` to page URLs; this page is available as [Markdown](https://docs.multiset.ai/fundamentals/third-party-scans/matterport-e57/matterpak-files.md).
# MatterPak Files
Connect your Matterport account with a developer token and process MatterPak bundles in the cloud, with no manual file upload.
The MultiSet Visual Positioning System now supports on-cloud processing of Matterport MatterPak files. This allows for a more streamlined and efficient workflow for converting your Matterport scans into usable VPS data.
{% hint style="info" %}
**Want a 360° tour as well?** A MatterPak space carries panoramic imagery, so it can also produce a navigable [360° Virtual Tour](/fundamentals/maps/output-asset/360-virtual-tour.md). Ask for it when you create the map by adding `"assets": ["pano"]` to `source.metadata`, see [MatterPak Upload](/fundamentals/rest-api-docs/map-upload/matterpak-upload.md). It is opt-in and cannot be added to a map that already exists.
{% endhint %}
#### Benefits of On-Cloud Processing
* **No High-End Hardware Required:** Instead of relying on the processing power of your local machine, on-cloud processing removes the dependency on local RAM and processing capabilities. This means you can process scans of any size without needing a powerful desktop computer.
* **Parallel Processing:** On-cloud processing enables you to run multiple scans simultaneously. This parallel processing capability significantly reduces the time required to process large batches of scans.
### Connect with your Matterport account using the Developer token
Once you login to your Matterport, select the right organisation from Top-right where scan is added.
Then in your Matterport account, navigate to settings -> Developer tools -> Apply for Production "**Private Use.**" You will need to fill out a Matterport form to get production access to **Secret ID and Secret Token.**
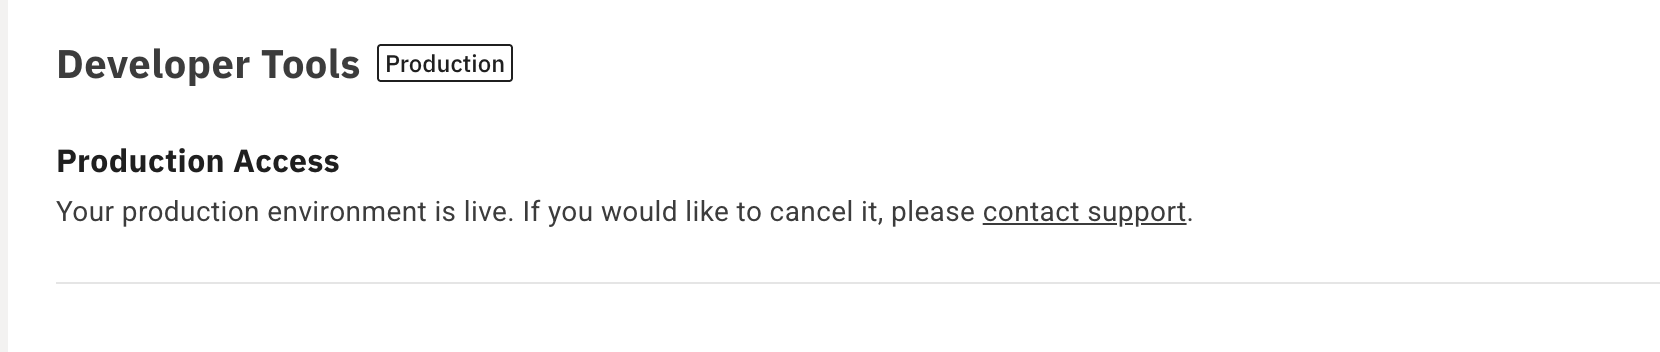
Matterport reviews the form before switching your account over, so approval is not instant. Once it goes through, the **Developer Tools** page carries a **Production** badge and a **Production Access** section reading "Your production environment is live." That is your confirmation that the account can issue production credentials.
Matterport Developer Tools once production access is approved
{% hint style="info" %}
If you do not see this, your account is still on sandbox access. Tokens created before approval will not fetch MatterPak bundles, so wait for the production environment to go live, then create the token.
{% endhint %}
Once you have granted Production Use, you need to create a new **API Token** to get a Secret **ID and Secret Token**
#### The On-Cloud Processing Workflow
Here is a step-by-step guide to processing your Matterport MatterPak files on the cloud with MultiSet:
**Step 1: Select Matterport as the Provider**
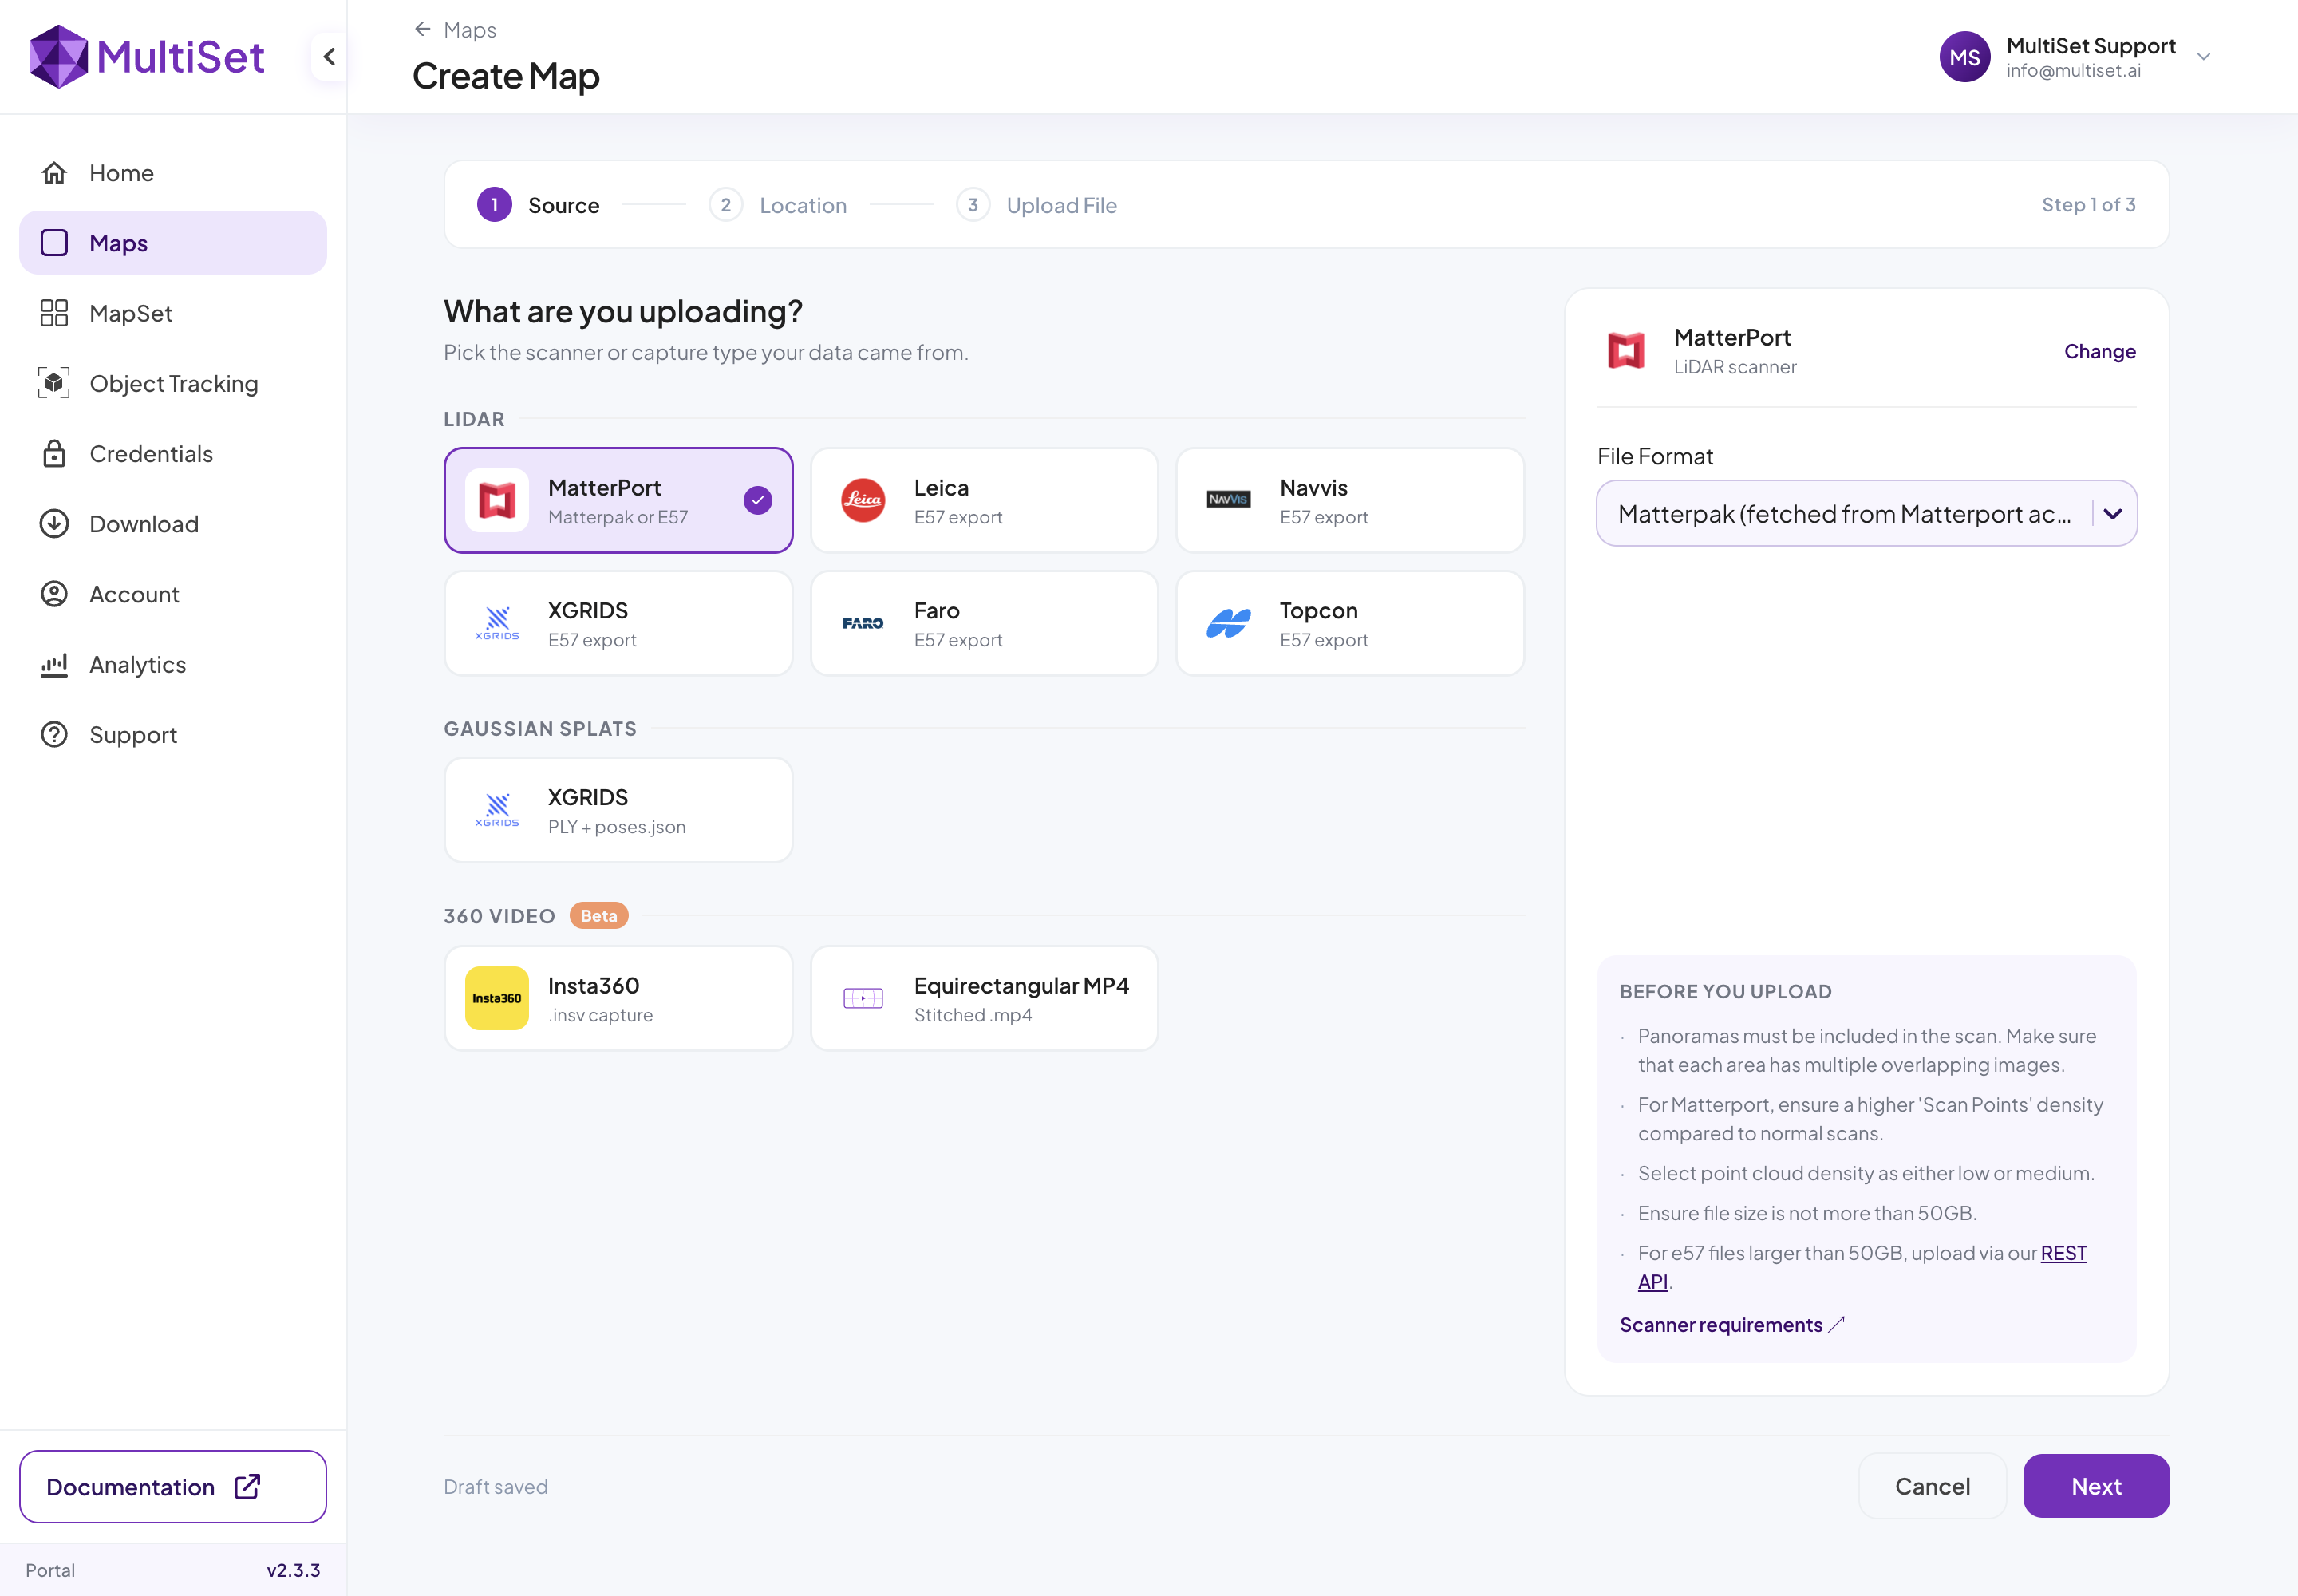
Navigate to your MultiSet Dashboard and go to **Maps -> Create Map -> Upload existing scan**. From the provider options, select **Matterport**. In the "File Format" dropdown, choose **Matterpak (fetched from Matterport account)**.
**Step 2: Authenticate Your Matterport Account**
To connect your MultiSet and Matterport accounts, you will need to provide your Matterport API credentials. Enter your **Token ID** and **Token Secret**. You can generate these credentials in your Matterport account settings under "Developer Tools."
**Step 3: Choose the Scan to Process**
Once your accounts are connected, you will see a list of your available Matterport spaces. Select the scan that you want to process. Please ensure that you have already purchased the MatterPak bundle for the selected scan in your Matterport account.
**Step 4: Add Metadata and Begin Processing**
Provide a **Map Name** for your project and set the location metadata. After you have filled in the necessary information, click on **Next** to begin the on-cloud processing.
---
# Agent Instructions
This documentation is published with GitBook. GitBook is the documentation platform designed so that both humans and AI agents can read, navigate, and reason over technical content effectively. Learn more at gitbook.com.
## Querying This Documentation
If you need additional information that is not directly available in this page, you can query the documentation by asking a question.
Perform an HTTP GET request on the following URL with the `ask` and `goal` query parameters:
```
GET https://docs.multiset.ai/fundamentals/third-party-scans/matterport-e57/matterpak-files.md?ask=&goal=
```
`ask` is the immediate question: it should be specific, self-contained, and written in natural language.
`goal` is what the user is ultimately trying to achieve, the reason they need the answer. Sharing it helps GitBook give you a better, more relevant answer. A goal is most helpful when it describes the outcome the user wants rather than restating the question. For example, with `ask=how do I create an API token`, a goal like `automate deployments from our CI pipeline` lets GitBook tailor the answer to that use case.
The response will contain a direct answer to the question and relevant excerpts and sources from the documentation.
Use this mechanism when the answer is not explicitly present in the current page, you need clarification or additional context, or you want to retrieve related documentation sections.