Team Members
Invite teammates to your MultiSet account, assign roles, and control what each person can access.
Team Members lets you share a single MultiSet account with the people you work with. Instead of sharing one login, you invite each teammate by email and give them a role that decides what they can see and do. Everyone works inside the same account, so your maps, MapSets, objects, and credentials stay in one place.
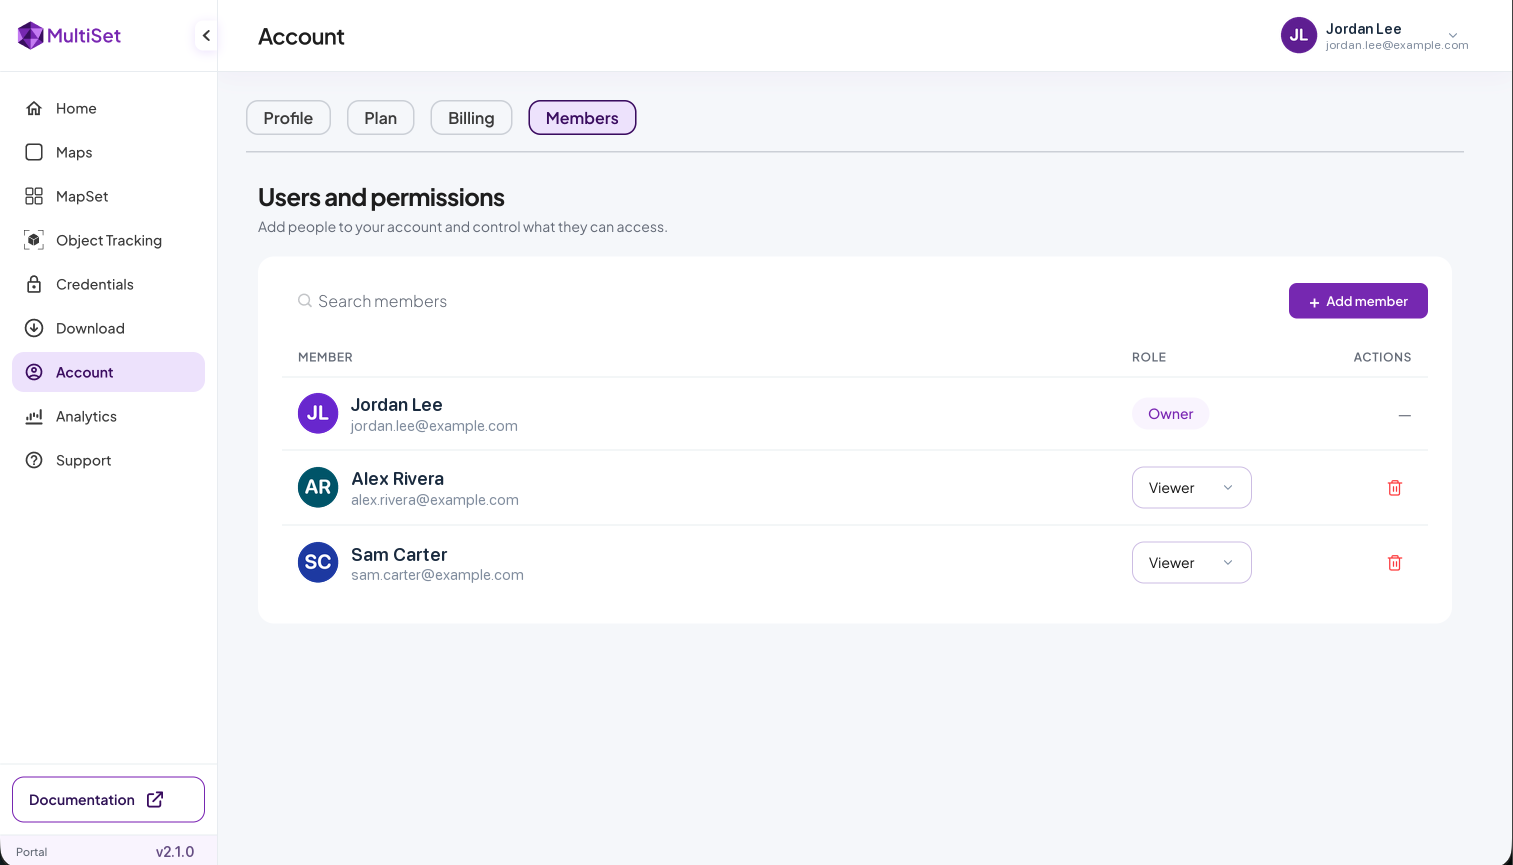
You manage your team from the Members tab in the Developer Portal.
Go to Developer Portal -> Account -> Members.

Roles
Every member has one of three roles. Roles are the same across the whole account, so a person's role decides what they can do everywhere in the portal.
Owner
Full access. Manage maps, MapSets, objects, and credentials, plus billing and members. Each account has exactly one owner.
Admin
Create, edit, and delete content (maps, MapSets, objects) and manage API credentials. Admins cannot access billing or manage members.
Viewer
Read-only. Viewers can see everything in the account but cannot create, edit, or delete anything.
The Owner is the person who created the account. Ownership is fixed: the owner cannot be removed and cannot leave the account. When you invite someone, you can assign them the Admin or Viewer role.
Invite a member
Only the account owner can invite members.
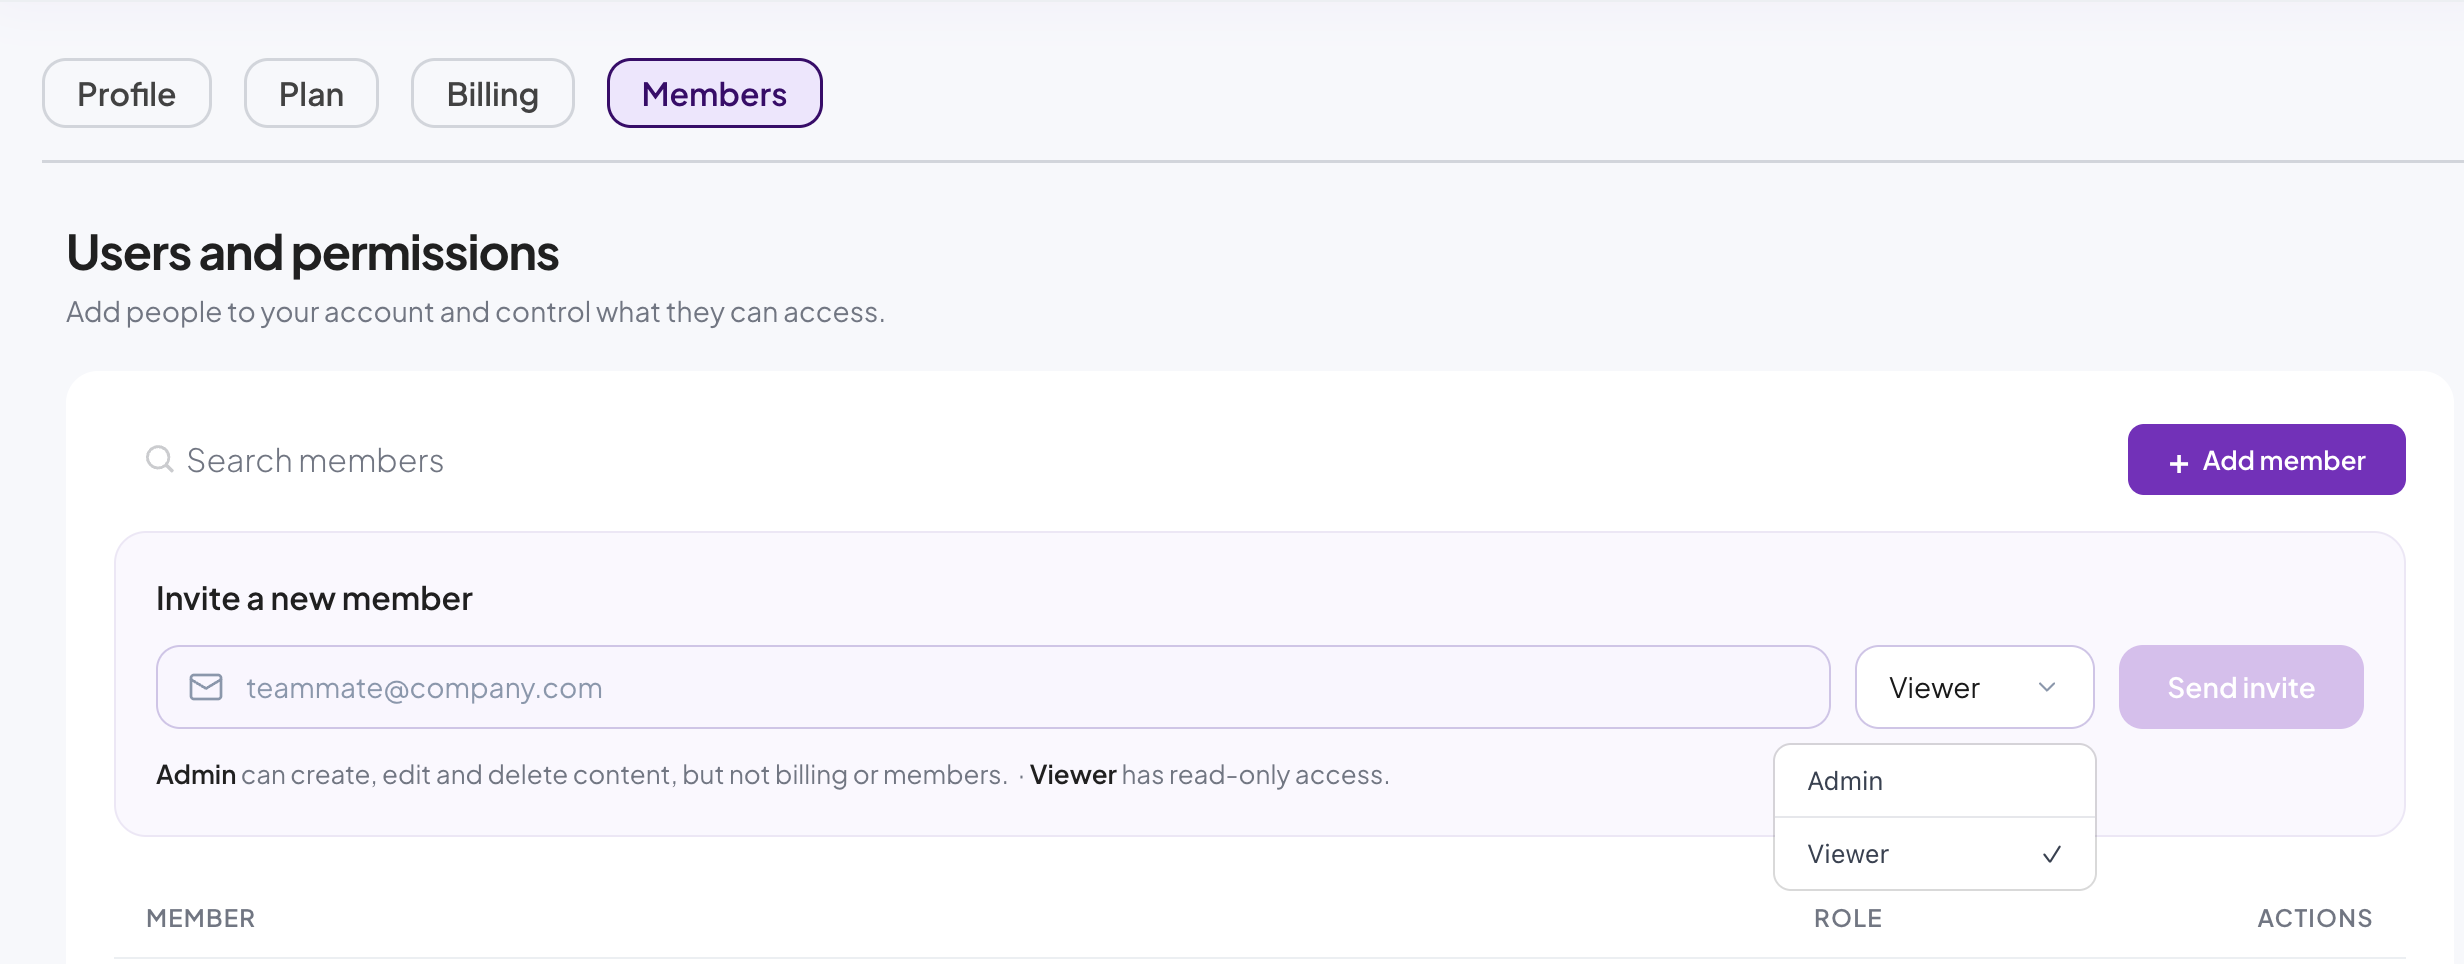
Open Account -> Members.
Select Add member.
Enter the teammate's email address.
Choose a role, Admin or Viewer.
Select Send invite.

The person receives an invitation email. The invite stays valid for 7 days, after which you can send a new one.
You can invite someone who does not have a MultiSet account yet. When they sign up with the same email address, the invitation is linked to their new account automatically, and they can accept it.
The number of members you can add depends on your plan. Pending invitations count toward your seat limit. If you reach the limit, remove a member or upgrade your plan to add more. If your current plan does not include team members, contact support@multiset.ai.
Accept an invitation
When you have been invited to an account, you see an invitation banner on your Home and Account pages once you sign in with the invited email.

Select Accept invitation to join. The account then appears in your account switcher, and you can start working in it with the role you were given.
Switch between accounts
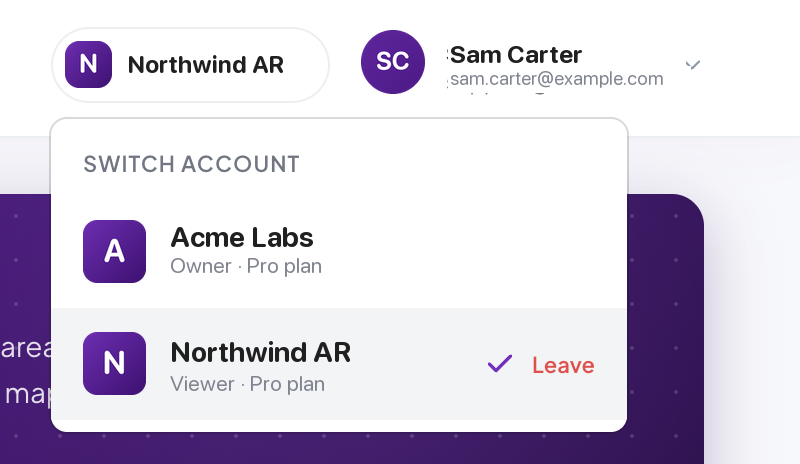
If you belong to more than one account (for example, your own account and one you were invited to), use the account switcher at the top of the portal to move between them. The switcher lists each account with your role in it, so you always know whether you are an Owner, Admin, or Viewer in the account you are viewing.

Manage existing members
From the Members tab, the owner can:
Change a role. Use the role dropdown next to a member to switch them between Admin and Viewer.
Remove a member. Select the delete icon to revoke a member's access to the account.
The owner's own row cannot be changed or removed.
Leave an account
Any member can leave an account they were invited to from the account switcher. The owner cannot leave their own account, because every account must always have an owner.
Last updated
Was this helpful?